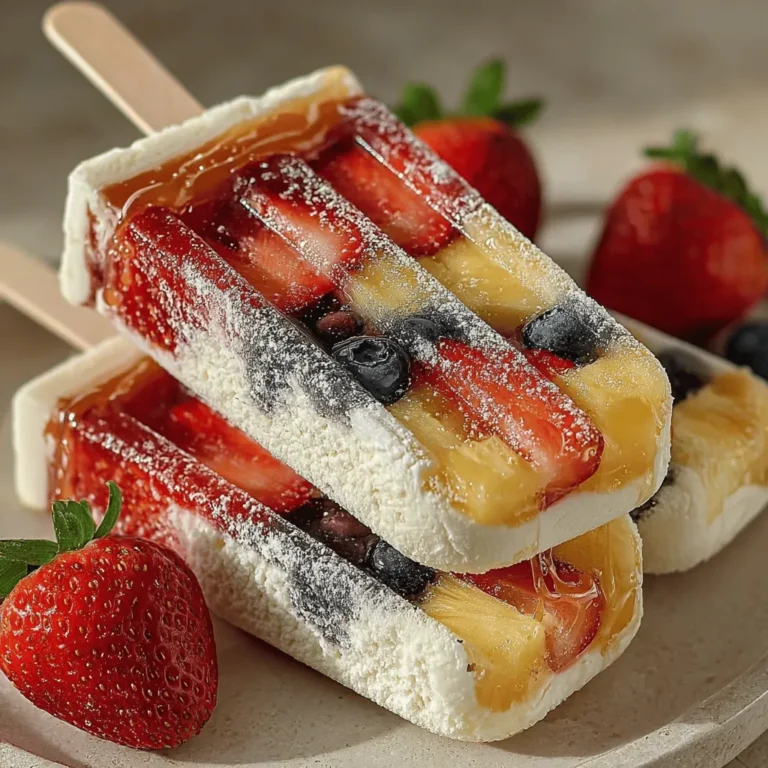
As the summer sun shines brightly and temperatures soar, there’s nothing quite as refreshing as a homemade popsicle. Forget store-bought varieties filled with artificial flavors and excess sugar; making your own popsicles at home allows you to control the ingredients, ensuring a delightful treat that’s both delicious and healthy. Enter the Fruity Chill Pops — a vibrant and nutritious popsicle recipe that combines Greek yogurt and fresh fruits, creating a perfect blend of flavor and nutrition. These pops are not only an irresistible treat for hot days but also a snack that caters to both adults and children alike.
The Health Benefits of Greek Yogurt and Fresh Fruits
Incorporating Greek yogurt into the Fruity Chill Pops recipe offers numerous health benefits. This creamy dairy product is a powerhouse of protein, making it a satiating choice for a snack. The probiotics found in Greek yogurt support gut health, contributing to overall wellness. Additionally, its versatility makes it an ideal base for various recipes, allowing you to experiment with different flavors and ingredients.
The fruits used in this recipe further enhance its nutritional profile. Strawberries, for instance, are not only delicious but also packed with antioxidants and essential vitamins, particularly vitamin C, which boosts the immune system. Blueberries are renowned for their brain-boosting properties, being rich in antioxidants that promote cognitive health. Pineapples add a tropical twist to the mix, providing a generous dose of vitamin C and digestive enzymes, which aid in digestion. Together, these ingredients create a symphony of flavors while delivering a host of health benefits.
To sweeten the pops naturally, we can use honey or maple syrup, both of which enhance the flavor without overpowering the nutritional qualities of the ingredients. Honey boasts antibacterial properties and provides a quick source of energy, while maple syrup contains antioxidants and essential minerals. These natural sweeteners not only make the pops taste better but also align with a health-conscious approach to snacking.
Preparing the Fruity Chill Pops
Now that we’ve established the delightful benefits of our ingredients, let’s dive into the preparation steps for creating these refreshing Fruity Chill Pops.
Preparing the Fruit
Selecting ripe, fresh fruit is crucial for achieving the best flavor in your popsicles. Here are some tips to ensure you pick the best strawberries, blueberries, and pineapples:
– Strawberries: Look for strawberries that are bright red, plump, and fragrant. Avoid any that appear dull or have green patches. Fresh strawberries should be firm to the touch and free from bruises. If they are overripe, they may result in a mushy texture in your popsicles.
– Blueberries: Choose blueberries that are deep blue in color with a silvery bloom. They should be firm and plump. Avoid any that are shriveled or have dark spots, as these may indicate overripeness.
– Pineapples: When selecting a fresh pineapple, look for one that has a sweet aroma and is firm to the touch. The leaves should be green and healthy. If you prefer using canned pineapple for convenience, make sure to choose a variety packed in its own juice rather than syrup, and drain it thoroughly to avoid excess liquid in your pops.
Once you have your fruits ready, it’s time to prepare them for blending. Wash the strawberries and blueberries under cold water and pat them dry. Remove the green tops from the strawberries and slice them into smaller pieces to make blending easier. If using fresh pineapple, peel, core, and chop it into bite-sized chunks.
Creating the Yogurt Base
The yogurt base is a critical component of the Fruity Chill Pops, providing a creamy texture and a tangy flavor that complements the fruit beautifully. To achieve the perfect consistency, it’s important to whisk the Greek yogurt thoroughly before combining it with the fruits. This helps break down any lumps, resulting in a smooth, creamy base that will freeze well.
In a medium-sized mixing bowl, add the Greek yogurt. Using a whisk or a hand mixer, beat the yogurt until it is smooth and creamy. This step is essential for ensuring that the popsicles have a uniform texture, allowing the flavors to blend seamlessly.
Once the yogurt is nicely whipped, you can begin to incorporate your selected fruits. Start by adding the chopped strawberries, blueberries, and pineapple to the yogurt base. Gently fold the fruits into the yogurt using a spatula, being careful not to overmix. You want the fruits to be evenly distributed throughout the mixture while still retaining some of their shape and texture.
At this stage, you can also add your chosen natural sweetener. If you prefer a sweeter pop, adjust the amount of honey or maple syrup to your taste. Mix it in gently until well combined, ensuring that the sweetness is evenly distributed throughout the yogurt and fruit mixture.
With your creamy fruit and yogurt blend ready, you are now just a few steps away from creating your very own Fruity Chill Pops. The next phase will involve pouring the mixture into molds and freezing them until they are solid. But before we dive into that, let’s take a moment to appreciate how simple and quick the preparation process has been so far. This recipe not only allows you to create a delightful summer treat but also ensures that you are nourishing your body with wholesome ingredients.
Stay tuned for the next part of the article, where we will cover the final steps to complete your Fruity Chill Pops and tips for storing and serving them!
{{image_2}}
Customizing the Yogurt Base with Additional Flavors
One of the best aspects of making Fruity Chill Pops is the ability to customize the yogurt base to suit your taste preferences. By adding various flavors, you can create a unique treat each time. Here are some ideas for enhancing your yogurt base:
– Citrus Zest: A teaspoon of lemon or lime zest can brighten the flavor and add a refreshing tang.
– Extracts: A few drops of vanilla, almond, or coconut extract can impart a delightful richness to the yogurt.
– Sweeteners: Adjust the sweetness by incorporating honey, agave syrup, or maple syrup. Start with a tablespoon and taste to adjust as needed.
– Spices: For an unexpected twist, consider adding a pinch of cinnamon or nutmeg. These spices complement fruit well and add warmth to the flavor profile.
Feel free to mix and match these options to develop a yogurt base that excites your palate. The key is to experiment and find combinations that you love.
Layering the Pops
Creating visually appealing layers in your Fruity Chill Pops not only makes them look stunning but also enhances the eating experience as different flavors and textures meld together. Here are some techniques for layering yogurt and fruit effectively:
Techniques for Layering Yogurt and Fruit
1. Use a Piping Bag: For precise control over the layering process, transfer your yogurt and fruit mixtures into separate piping bags. This allows for clean, defined layers without the mess.
2. Alternate Layers: Start by adding a layer of yogurt, followed by a layer of pureed fruit. Repeat this pattern until you reach the top of your molds. This method creates an attractive stripe effect that showcases the vibrant colors of your ingredients.
3. Stirring for Swirls: Instead of distinct layers, you can create a marbled effect by gently swirling the yogurt and fruit together using a skewer or a chopstick. This technique adds visual interest while still providing a delightful mix of flavors.
Suggestions for Alternating Colors and Textures
To truly make your Fruity Chill Pops pop visually, consider these suggestions:
– Contrasting Colors: Use a combination of fruits that offer vibrant colors. For example, the bright red of strawberries, the sunny yellow of mango, and the deep purple of blueberries create a stunning visual impact.
– Texture Variety: Combine smooth yogurt with chunky fruit pieces for a delightful contrast in texture. For instance, layer creamy yogurt with a layer of diced fruit or fruit puree for an exciting bite.
– Layered Patterns: For a fun twist, try layering different fruits within the same layer. For example, you can alternate between strawberry puree and blueberry puree for a beautiful gradient effect.
Freezing and Serving the Pops
Once you’ve crafted your Fruity Chill Pops, it’s essential to freeze them properly to achieve the optimal texture and ensure they maintain their delicious flavor.
Best Practices for Freezing
– Freezing Time: Allow your pops to freeze for at least 4-6 hours, or until completely solid. For best results, leave them overnight. This ensures that your pops are firm and ready to enjoy without any risk of melting or losing their shape.
– Storage: If you plan to store the pops for an extended period, wrap each mold in plastic wrap or place them in an airtight container to prevent freezer burn. This will help maintain the quality and taste of your fruity treats.
Unmolding Techniques
To safely release your Fruity Chill Pops from their molds without damaging them, follow these steps:
1. Warm the Mold: Run warm water over the outside of your pop molds for about 10-15 seconds. This helps loosen the pops without compromising their structure.
2. Twist and Pull: Gently twist the stick while pulling upward. This should help the pop slide out of the mold smoothly.
3. Tap if Necessary: If the pops are still stuck, tap the mold against a solid surface to help release the pop.
Suggestions for Serving
Presenting your Fruity Chill Pops can be just as enjoyable as making them. Here are some creative ideas for serving:
– On a Platter: Arrange your pops on a colorful platter. This allows guests to choose their favorite flavors easily.
– Dip and Decorate: Consider dipping the top of the pops in melted chocolate or yogurt before sprinkling them with crushed nuts or shredded coconut for added texture and flavor.
– Garnishing: Drizzle with honey or agave syrup and sprinkle with shredded coconut or chopped mint leaves for an appealing finish.
Optional Enhancements and Variations
To keep your Fruity Chill Pops exciting and new, consider these optional enhancements and variations:
Garnishing Options
– Honey Drizzle: A light drizzle of honey before serving adds a touch of sweetness and a beautiful sheen to your pops.
– Shredded Coconut: Roll the pops in shredded coconut or sprinkle on top for an appealing tropical flair.
Flavor Variations
– Alternative Fruits: Mix it up by using different fruits such as kiwi, mango, or raspberries. Each fruit brings its unique flavor and color, allowing for endless combinations.
– Yogurt Flavors: Experiment with flavored yogurts like vanilla, coconut, or even flavored Greek yogurt. This can add another layer of taste to your pops.
Dietary Adaptations
For those with dietary restrictions, there are simple adaptations to make these pops accessible to everyone:
– Dairy-Free: Substitute regular yogurt with plant-based yogurts like almond, coconut, or soy yogurt. These alternatives provide a creamy base without the dairy.
– Vegan Options: Use agave syrup or maple syrup instead of honey for a fully vegan treat. The rest of the ingredients will remain the same, ensuring that everyone can enjoy these refreshing pops.
Conclusion
Making Fruity Chill Pops at home is a simple and rewarding way to indulge in a refreshing treat that is both delicious and nutritious. The ability to customize flavors, layer ingredients beautifully, and experiment with various fruits and yogurts allows you to create personalized frozen desserts that cater to your tastes and dietary needs.
Whether you’re enjoying them on a sunny afternoon or serving them at a gathering, Fruity Chill Pops are sure to be a hit. The joy of creating your own frozen treats is matched only by the satisfaction of sharing them with family and friends. So, gather your ingredients, unleash your creativity, and enjoy the refreshing taste of these delightful pops throughout the summer!


