Frosty Vanilla Dream Cake Bars: A Refreshing Delight
Indulging in a sweet treat can be one of life’s simplest pleasures, especially when it comes to desserts that combine comfort and refreshment. The Frosty Vanilla Dream Cake Bars epitomize this delightful balance. These bars bring together the creamy essence of vanilla bean frozen yogurt with a soft, cake-like base, creating a dessert that is not only satisfying but also perfect for warm days or any occasion that calls for a refreshing treat. This recipe is designed to be approachable, making it ideal for bakers of all skill levels, from seasoned chefs to kitchen novices.
The allure of these bars lies not just in their taste but also in their visual appeal. With a light, fluffy texture and a sweet, creamy layer, they are a feast for both the eyes and the palate. In this article, we will delve into the essential ingredients that make up these delightful bars, provide a step-by-step guide to crafting them, and share some insightful tips to enhance your baking experience. Get ready to embark on a culinary adventure that will surely impress your family and friends!
Understanding the Ingredients
To create the perfect Frosty Vanilla Dream Cake Bars, it’s crucial to understand the role each ingredient plays in the recipe. Here’s a breakdown of the core components that contribute to the flavor, texture, and overall success of this delectable dessert.
Vanilla Bean Frozen Yogurt
At the heart of this recipe is vanilla bean frozen yogurt, which serves as the star ingredient. Its rich, creamy texture and aromatic vanilla flavor elevate the bars, transforming a simple cake into a dreamy dessert. Unlike regular ice cream, frozen yogurt offers a tangy note that beautifully complements the sweetness of the cake base. This ingredient not only provides flavor but also adds a refreshing quality that makes these bars perfect for warm weather.
All-Purpose Flour
All-purpose flour is essential for providing structure and texture to baked goods. In this recipe, it helps achieve the desired softness of the cake base while ensuring that the bars hold their shape when cut. It’s important to measure the flour accurately to avoid a dense texture; too much flour can lead to a dry outcome, while too little can result in a soggy consistency.
Granulated Sugar
Sugar is more than just a sweetener; it plays a pivotal role in balancing moisture and flavor. In the Frosty Vanilla Dream Cake Bars, granulated sugar contributes to the overall sweetness while also aiding in the browning of the cake. The sugar helps create a tender crumb by interacting with the butter and eggs, resulting in a moist and flavorful base.
Unsalted Butter
Using unsalted butter allows you to control the sodium content in your baking while enhancing flavor and texture. Butter adds richness and moisture to the cake, contributing to its tender crumb. It’s best to use butter at room temperature, which makes it easier to cream together with sugar for the perfect batter consistency.
Eggs
Eggs serve multiple purposes in baking; they act as a binding agent, help with leavening, and add moisture. In these bars, eggs provide structure and stability to the cake base, helping it rise beautifully in the oven. Be sure to use large eggs, as this is the standard size for most baking recipes.
Pure Vanilla Extract
To intensify the vanilla flavor, pure vanilla extract is added to the batter. This ingredient enhances the cake’s aroma and taste, making the dessert even more delightful. Opting for pure vanilla extract over imitation vanilla ensures a richer and more robust flavor profile.
Baking Powder and Salt
Baking powder is a crucial leavening agent that helps the cake rise, creating a light and airy texture. Salt, while often overlooked, is equally important; it enhances the flavors of the other ingredients, making the final product more balanced and enjoyable. Together, these components ensure that the cake base bakes to perfection.
Optional Ingredients: Mini Chocolate Chips and Colorful Sprinkles
For those looking to add a playful twist, consider incorporating mini chocolate chips or colorful sprinkles into the batter. These optional ingredients can provide an exciting burst of flavor or a festive appearance, making your Frosty Vanilla Dream Cake Bars even more enticing.
Step-by-Step Guide to Making Frosty Vanilla Dream Cake Bars
Now that we’ve explored the essential ingredients, let’s dive into the step-by-step process of making these delightful bars. Following these instructions will ensure that your baking experience is smooth and rewarding.
1. Preparing the Dry Ingredients
Start by gathering your dry ingredients: all-purpose flour, baking powder, and salt. In a medium bowl, whisk together the flour, baking powder, and salt until well combined. This step is crucial for achieving the right consistency in your cake batter. Whisking the dry ingredients helps to evenly distribute the baking powder and salt, preventing any clumping that could affect the cake’s rise.
2. Mixing the Wet Ingredients
In a separate large bowl, cream together the unsalted butter and granulated sugar using an electric mixer on medium speed. Beat until the mixture is light and fluffy, which usually takes about 3 to 5 minutes. Next, add the eggs one at a time, mixing well after each addition. Finally, incorporate the pure vanilla extract. The goal here is to create a smooth, homogenous mixture that serves as the foundation for your cake batter.
3. Combining Wet and Dry Mixtures
Gently add the dry ingredient mixture to the wet ingredients, stirring with a spatula or wooden spoon. Be careful not to overmix; this can lead to a dense cake. Mix just until the flour is incorporated and the batter is smooth. If desired, fold in the optional mini chocolate chips or sprinkles at this stage for added fun and flavor.
4. Preparing for Baking
Before pouring the batter into the pan, prepare your baking dish. Grease a 9×13-inch baking pan with cooking spray or butter, then line the bottom and sides with parchment paper for easy removal. This step ensures that your cake bars come out cleanly and retain their shape.
5. Baking the Cake Base
Pour the cake batter into the prepared pan, spreading it evenly. Preheat your oven to 350°F (175°C) and bake the cake for approximately 25 to 30 minutes, or until a toothpick inserted in the center comes out clean. Keep an eye on the cake during the last few minutes of baking to prevent overcooking, which can dry it out.
6. Creating the Yogurt Layer
Once the cake base has cooled completely in the pan, it’s time to add the vanilla bean frozen yogurt layer. Remove the yogurt from the freezer and let it soften slightly at room temperature for about 10 minutes. Once it’s easier to spread, gently spoon the yogurt over the cooled cake base, smoothing it out to create an even layer. This creamy topping is what makes these cake bars so irresistible.
By following these initial steps, you will set the stage for creating a deliciously satisfying dessert that is sure to impress. Stay tuned for the next part of this article, where we will explore additional tips, variations, and ways to serve your Frosty Vanilla Dream Cake Bars for maximum enjoyment.
{{image_2}}
Freezing the Cake Bars: How Long to Freeze for the Best Results
Once you have assembled your Frosty Vanilla Dream Cake Bars, the freezing step is crucial to achieving the perfect texture and flavor. For the best results, you should freeze the cake bars for at least 4 hours. This time allows the bars to firm up, making them easy to cut and ensuring they hold their shape when served.
If you want to prepare them in advance, feel free to freeze them overnight. Just make sure to wrap them tightly in plastic wrap or store them in an airtight container to prevent freezer burn. For optimal flavor retention, aim to consume the bars within two weeks of freezing. After this time, while they may still be safe to eat, the flavor and texture may start to degrade.
Cutting and Serving: Techniques for Neat and Appealing Presentation
When it comes time to serve your Frosty Vanilla Dream Cake Bars, presentation is key. Here are some techniques to ensure that your bars are cut neatly and look as delicious as they taste:
1. Use a Sharp Knife: A sharp knife is essential for cutting through frozen desserts without crushing them. Warm the blade under hot water before cutting, then wipe it dry. This technique will allow you to slice through the bars cleanly.
2. Cutting Technique: For optimal slices, cut the bars into squares or rectangles while they are still slightly frozen. This makes the cutting process smoother. If the bars are too hard to cut, let them sit at room temperature for about 5-10 minutes before attempting to slice.
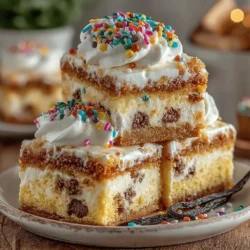
3. Presentation: Arrange the sliced bars on a serving platter. For an added touch, you can dust them with powdered sugar or drizzle a bit of chocolate sauce on top for enhanced visual appeal.
4. Garnish: Consider garnishing each bar with a dollop of whipped cream or a few fresh berries. This not only elevates the presentation but also adds flavor and freshness to each bite.
Baking Tips and Techniques
Enhancing your baking skills is crucial for achieving the best version of your Frosty Vanilla Dream Cake Bars. Here are some key points to consider:
Importance of Ingredient Temperature
Using ingredients at room temperature can significantly improve the texture of your cake bars. Specifically, the eggs and yogurt should be at room temperature before mixing. This allows for better incorporation into the batter, resulting in a lighter and fluffier texture.
Best Practices for Measuring Flour
Accurate flour measurement is essential to avoid dense cake bars. Instead of scooping flour directly from the bag, use the spoon-and-level method. Fluff up the flour in its container, then spoon it into your measuring cup. Use a straight edge, like a spatula, to level off the excess. This method prevents packing and ensures you’re using just the right amount of flour.
The Role of Cooling
After baking, allow your cake to cool completely before adding the yogurt layer. If the cake is still warm, it may cause the yogurt to melt, ruining the intended texture. Cooling for at least 30 minutes is advisable, ensuring a firm base for your delicious frozen topping.
Techniques for Cutting Frozen Desserts
For cutting frozen desserts like these cake bars, consider using a serrated knife or a bench scraper for precise cuts. If you find the bars are too hard to slice, you can let them sit out for a few minutes until they soften up slightly. This makes cutting easier and helps maintain their shape.
Flavor Variations and Customizations
Get creative with your Frosty Vanilla Dream Cake Bars! Here are some ideas to inspire your culinary journey:
Substituting Frozen Yogurt with Different Flavors
While vanilla is a classic choice, you can experiment with various frozen yogurt flavors to suit your taste preferences. Consider using chocolate, strawberry, or coffee-flavored yogurt for a delightful twist on the original recipe. Each flavor will bring a unique character to your cake bars.
Adding Fruit Toppings or Sauces
Enhance your cake bars with fresh fruit toppings or rich sauces. Fresh berries, such as strawberries, raspberries, or blueberries, can be added on top for a burst of flavor and color. Alternatively, a drizzle of chocolate or caramel sauce can elevate the dessert, making it even more indulgent.
Experimenting with Mix-Ins
For added texture, consider mixing in ingredients like nuts, coconut flakes, or crushed cookies into the yogurt layer. These mix-ins add crunch and flavor, transforming your cake bars into a more dynamic dessert experience.
Adapting for Dietary Preferences
If you have specific dietary needs, this recipe can easily be adapted. For a gluten-free version, substitute regular flour with a gluten-free blend. If you prefer a dairy-free option, you can use dairy-free yogurt alternatives. These adjustments make it possible for everyone to enjoy these delicious cake bars.
Storing and Serving Suggestions
Maximize the freshness and enjoyment of your Frosty Vanilla Dream Cake Bars with these helpful tips:
Best Practices for Storing Leftover Bars
To keep your cake bars fresh, store any leftovers in an airtight container in the freezer. Make sure to separate layers with parchment paper to prevent sticking. This method helps maintain the quality of the bars, allowing you to enjoy them later without compromising flavor or texture.
Creative Serving Ideas
When it comes to serving, think beyond just slicing and plating. Pair your Frosty Vanilla Dream Cake Bars with fresh fruit, like sliced strawberries or a medley of berries, for added freshness. A dollop of whipped cream or a drizzle of warm chocolate sauce adds an extra layer of indulgence, making your dessert truly memorable.
Making Ahead
These cake bars are perfect for planning ahead. Whether you’re preparing for a gathering, a birthday celebration, or just a weeknight treat, make them in advance. Their ability to freeze well allows you to whip them out whenever the craving strikes, ensuring you always have a delightful dessert at hand.
Conclusion
Frosty Vanilla Dream Cake Bars are not just a dessert; they are a delightful blend of flavors and textures that can be enjoyed any time of year. With easy-to-follow steps and the option to customize, this recipe is bound to become a favorite in your kitchen. Whether served at a summer gathering or enjoyed as a sweet treat after dinner, these cake bars are sure to satisfy your sweet tooth and impress your guests. Enjoy the process of making them as much as you will savor every bite!