
Introduction
As the school season approaches, busy parents and hungry kids alike are on the lookout for delicious, easy-to-make snacks that can satisfy cravings while providing nourishment. One such snack that has gained popularity is Back to School Pizza Roll-Ups. These delightful treats combine the fun of pizza with the convenience of a roll-up, making them an ideal option for snack time, lunchboxes, or after-school munchies. They are not only quick to prepare but also highly customizable, allowing children to tailor their roll-ups to fit their unique tastes. In this article, we will delve into the ingredients, preparation steps, and helpful tips for making these mouthwatering roll-ups that will have your kids eagerly anticipating snack time.
Understanding the Appeal of Pizza Roll-Ups
Exploration of Pizza as a Family Favorite
Pizza is a universally loved dish that resonates with both children and adults. Its appeal lies in its versatility; from classic pepperoni to adventurous toppings like pineapple and jalapeños, there’s a pizza flavor for everyone. For kids, pizza often represents a special treat, a food that is both delicious and fun. It embodies comfort and satisfaction, making it a go-to choice for family dinners, parties, and casual gatherings. This fondness for pizza naturally extends to pizza roll-ups, which retain all the flavors of traditional pizza but offer a new and exciting way to enjoy them.
The Fun Factor of Roll-Ups
What makes roll-ups particularly appealing, especially to children, is their fun and interactive nature. Roll-ups are easy to handle and require minimal utensils, making them perfect for little hands. Kids can dive right in, enjoying the chewy texture and melty cheese without the mess that often comes with traditional pizza slices. Additionally, their portable format makes them an excellent choice for lunchboxes or quick snacks after school. Whether served warm or at room temperature, pizza roll-ups are a delightful option that can be enjoyed anytime, anywhere.
Ingredients Breakdown
Store-Bought vs. Homemade Pizza Dough
When it comes to the base of your pizza roll-ups, you have the option of using store-bought or homemade pizza dough. For busy parents, store-bought dough can be a lifesaver, providing convenience without compromising on taste. Most grocery stores offer a variety of pizza dough options, from classic to whole wheat, making it easy to find something that fits your family’s dietary preferences.
If you’re feeling adventurous and have a little extra time, making homemade pizza dough can be a rewarding experience. Homemade dough allows you to control the ingredients, ensuring freshness and flavor. A simple mixture of flour, yeast, water, and a pinch of salt can be transformed into a delicious base for your roll-ups. Whether you choose store-bought or homemade, the dough serves as the foundation for your tasty creations.
Essential Ingredients
Each ingredient in these pizza roll-ups plays a significant role in crafting the perfect snack. Here’s a breakdown of the essential components:
– Marinara Sauce: This serves as the flavor base and moisture for the roll-ups. A good quality marinara sauce enhances the overall taste and provides that classic pizza flavor.
– Mozzarella Cheese: Known for its melty goodness and stretchy texture, mozzarella is a must-have in any pizza dish. It binds the toppings together and adds a creamy richness that kids love.
– Pepperoni and Other Toppings: Pepperoni is a fan favorite, but the beauty of pizza roll-ups is their adaptability. You can mix and match various toppings such as bell peppers, mushrooms, or even olives to cater to your child’s preferences.
– Parmesan Cheese: Sprinkling some grated Parmesan on top adds a delicious depth of flavor, enhancing the overall taste of the roll-ups.
– Italian Seasoning, Garlic Powder, and Red Pepper Flakes: These ingredients elevate the flavor profile of your roll-ups. Italian seasoning provides an aromatic touch, garlic powder adds a savory depth, and red pepper flakes offer a hint of heat for those who enjoy a little kick.
Optional Ingredients and Variations
One of the best aspects of pizza roll-ups is their versatility. If you’re looking to switch things up, consider incorporating alternative toppings. Vegetables like spinach, zucchini, or artichokes can make for a healthier version, while a variety of cheeses such as cheddar or feta can introduce exciting flavor profiles. For those with dietary restrictions, there are also vegan and gluten-free options available. Using gluten-free pizza dough or substituting cheese with vegan alternatives ensures that everyone can enjoy these tasty roll-ups.
Step-by-Step Instructions
Preheating the Oven and Preparing the Baking Sheet
Before you begin assembling the roll-ups, it’s crucial to preheat your oven. This step is vital for ensuring even cooking and achieving that perfect golden-brown finish. Set your oven to 425 degrees Fahrenheit and allow it to preheat fully while you prepare the other components of your roll-ups.
Next, you’ll want to prepare your baking sheet. Line it with parchment paper or a silicone baking mat to prevent sticking and make cleanup a breeze. If you don’t have these on hand, a light coating of cooking spray can also do the trick. Ensuring that your baking surface is properly prepared will help your roll-ups come out perfectly cooked and easy to handle.
With the oven preheating and the baking sheet ready, you’re well on your way to creating delicious Back to School Pizza Roll-Ups that your kids will love! In the following sections, we will continue with the detailed steps on assembling and baking these delightful snacks. Stay tuned for the mouthwatering transformation from simple ingredients to a snack that’s sure to be a hit!
{{image_2}}
Rolling Out the Dough
Rolling out the dough is a crucial step in creating your Pizza Roll-Ups. To ensure uniformity, start with a well-floured surface. Dust a generous amount of flour on your countertop or cutting board before placing the dough down. This prevents sticking and allows for easy rolling. Using a rolling pin, begin from the center of the dough and roll outward in all directions. Rotate the dough occasionally to maintain an even thickness, aiming for about ¼ inch thick.
A consistent thickness is essential for even cooking; thicker areas may remain doughy while thinner areas can burn. If you find the dough sticking, sprinkle a bit more flour as needed. Remember to handle the dough gently to maintain its elasticity.
Layering Sauce and Cheese
Once your dough is rolled out to perfection, it’s time to layer on the sauce and cheese. Start by spreading your pizza sauce evenly across the surface, leaving about a half-inch border around the edges. This border is vital as it helps prevent the sauce from overflowing during the rolling and baking process. Use the back of a spoon or a spatula for a smooth, even layer.
After applying the sauce, sprinkle a generous layer of cheese over the sauce. The cheese not only adds flavor but also acts as a glue that holds the roll-ups together. For a delightful twist, consider mixing different types of cheese like mozzarella and cheddar, or adding some grated Parmesan for an extra flavor boost.
Adding Toppings
Now comes the fun part—adding your toppings! Distributing the toppings evenly is key to a balanced flavor profile in each roll-up. Whether you opt for pepperoni, bell peppers, olives, or mushrooms, make sure to spread them evenly across the cheese layer.
Consider the textures and flavors of your toppings. For instance, if you’re using a variety of vegetables, ensure they are finely chopped and spread out to avoid clumping. This strategy not only enhances the visual appeal but also ensures that every bite bursts with flavor. Aim for a mix of savory and slightly sweet toppings to create depth in flavor and keep your taste buds intrigued.
Rolling and Sealing the Dough
With the sauce, cheese, and toppings in place, it’s time to roll and seal the dough. Begin at the edge closest to you and carefully roll the dough away from you, keeping the filling tightly wrapped inside. A gentle but firm pressure will help ensure a tight roll, which is crucial for the integrity of the Pizza Roll-Ups.
As you roll, make sure to keep the edges even and aligned. Once rolled, pinch the seams and ends of the dough to seal them securely. This step is essential to prevent any filling from leaking out during baking. For an extra layer of security, you can use a fork to crimp the edges, adding a decorative touch while ensuring the filling remains intact.
Slicing for Perfect Portions
After rolling and sealing, it’s time to slice your Pizza Roll-Ups into perfect portions. Use a sharp knife to cut the roll into 1 to 1.5-inch thick pieces. This thickness allows for even cooking and ensures that each piece maintains its shape.
When arranging the slices on a baking sheet, leave some space between each roll-up. This spacing is important as it allows hot air to circulate around each roll, promoting even cooking and browning. If you prefer a bit of crunch, consider lining the baking sheet with parchment paper for easier cleanup and to prevent sticking.
Brushing and Baking
Before popping your roll-ups into the oven, brush the tops with a light coating of olive oil. This not only helps achieve a golden, crispy exterior but also enhances the overall flavor of the roll-ups. You can also sprinkle a pinch of Italian seasoning or garlic powder on top for additional flavor.
Bake the Pizza Roll-Ups in a preheated oven at 400°F (200°C) for about 15-20 minutes. Keep an eye on them, as baking times may vary depending on your oven. You want them to be golden brown and crispy on the outside while the cheese melts deliciously inside. Once done, remove them from the oven and let them cool slightly before serving.
Serving Suggestions
Best Ways to Serve Pizza Roll-Ups
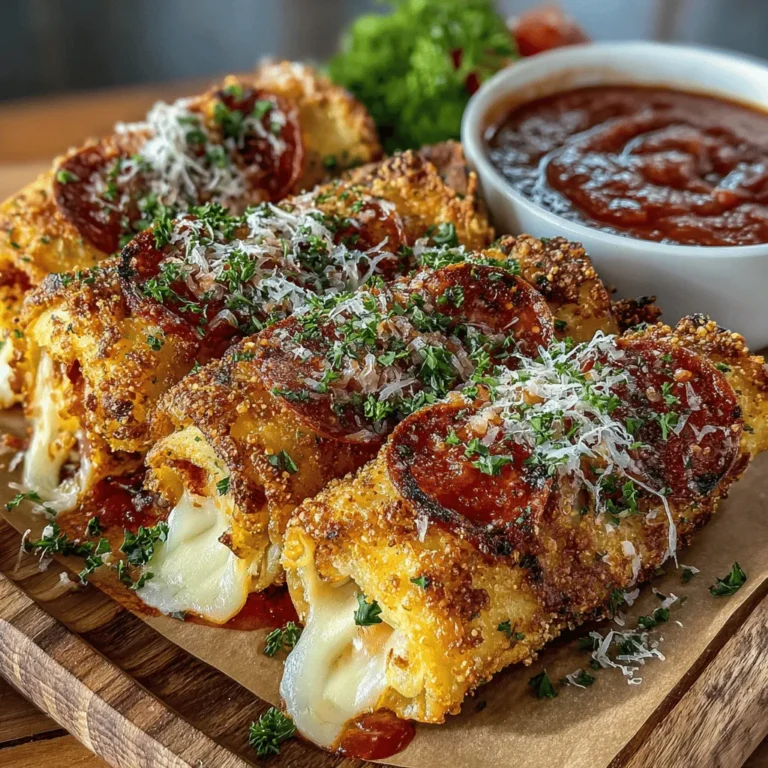
Presentation can elevate your Pizza Roll-Ups from a simple snack to an impressive dish. Arrange the roll-ups on a large platter, and consider serving them with a variety of dipping sauces. Marinara sauce is a classic choice, but you could also offer ranch dressing, garlic butter, or a spicy aioli to cater to different tastes.
For a more colorful presentation, garnish the platter with fresh herbs like basil or parsley. This not only adds a pop of color but also hints at the fresh flavors inside.
Pairing Suggestions
To complete your meal, consider pairing your Pizza Roll-Ups with a fresh salad or some seasonal fruit. A light arugula salad drizzled with balsamic vinaigrette complements the richness of the roll-ups beautifully. Alternatively, fresh fruit skewers can add a sweet contrast that balances the savory flavors of the dish.
If you’re looking to elevate the experience even further, consider serving your roll-ups alongside a refreshing drink. A sparkling lemonade or iced tea can provide a nice contrast to the warmth and cheesiness of the roll-ups, making for a delightful dining experience.
Making it a Meal
To turn your Pizza Roll-Ups into a full meal, think about adding sides that enhance the overall experience. Roasted vegetables or a classic Caesar salad can round out the meal perfectly.
If you have any leftovers, reheating them is simple. Place them back in the oven for a few minutes to restore their crispy exterior, or microwave them for a quick snack. You can also get creative with leftovers—consider chopping them up and tossing them into a pasta salad or serving them over a bed of greens for a unique twist on a pizza salad.
Conclusion
Back to School Pizza Roll-Ups are not just a hit among kids; they are simple to make and can be tailored to fit any palate. With a few basic ingredients and some creativity, you can whip up a delightful snack that will keep your family satisfied. Whether for after-school munchies or lunchbox delights, these roll-ups are sure to become a staple in your kitchen. Embrace the back-to-school season with this easy and fun recipe that brings smiles and satisfaction to every bite!
