
Mini Back to School Cookies: A Delightful Treat to Kick Off the School Year
As summer draws to a close, the excitement of the back-to-school season begins to unfold. Parents and children alike start preparing for a new academic year filled with learning, friendships, and routines. One way to make this transition smoother and more enjoyable is by creating fun and delicious snacks that can brighten up a child’s day. These Mini Back to School Cookies are not only scrumptious but also perfectly sized for lunch boxes or after-school treats, making them an ideal choice for busy families. With their delightful flavors and vibrant appearance, they are sure to be a hit with kids and adults alike.
The Joy of Baking for School
Baking with children during the back-to-school season offers numerous benefits that go beyond simply making treats. It’s a wonderful bonding experience that fosters communication and teamwork. As parents and kids work side by side in the kitchen, they engage in conversations about school, share stories, and create lasting memories. This shared activity not only strengthens family ties but also instills a sense of responsibility in children as they learn the basics of cooking and baking.
In addition to promoting family bonding, baking can encourage creativity in children. As they mix ingredients, shape cookies, and choose decorations, kids are given the freedom to express themselves. This creative outlet can be particularly beneficial during a time when they may feel nervous or anxious about returning to school. Moreover, baking together can introduce healthy eating habits—by involving children in the process, they become more invested in the foods they consume, learning the importance of ingredients and nutrition.
Understanding the Ingredients
To create the perfect Mini Back to School Cookies, it’s essential to understand the role of each ingredient in the recipe. Here’s a breakdown of the key components:
– All-Purpose Flour: This is the foundation of the cookie, providing structure and stability. It helps form the dough and gives the cookies their chewy texture. Choosing high-quality flour can make a significant difference in the final product.
– Baking Soda: This leavening agent is crucial for achieving the right texture in cookies. When combined with an acid (like brown sugar or butter), baking soda releases carbon dioxide, helping the cookies rise and become light and fluffy.
– Unsalted Butter: The choice of butter is vital for flavor and texture. Unsalted butter allows for better control over the overall saltiness of the cookies. It adds richness and moisture, contributing to a tender crumb.
– Sugars: A mix of granulated sugar and brown sugar balances sweetness while providing moisture. Brown sugar adds a hint of caramel flavor due to its molasses content, making the cookies richer.
– Vanilla Extract: This ingredient enhances the cookies’ flavor profile, adding depth and a warm, inviting aroma. Pure vanilla extract is preferred for its authentic taste.
– Egg: Eggs serve as a binding agent, holding all the ingredients together. They also contribute to the cookies’ structure and moisture, ensuring a soft and chewy texture.
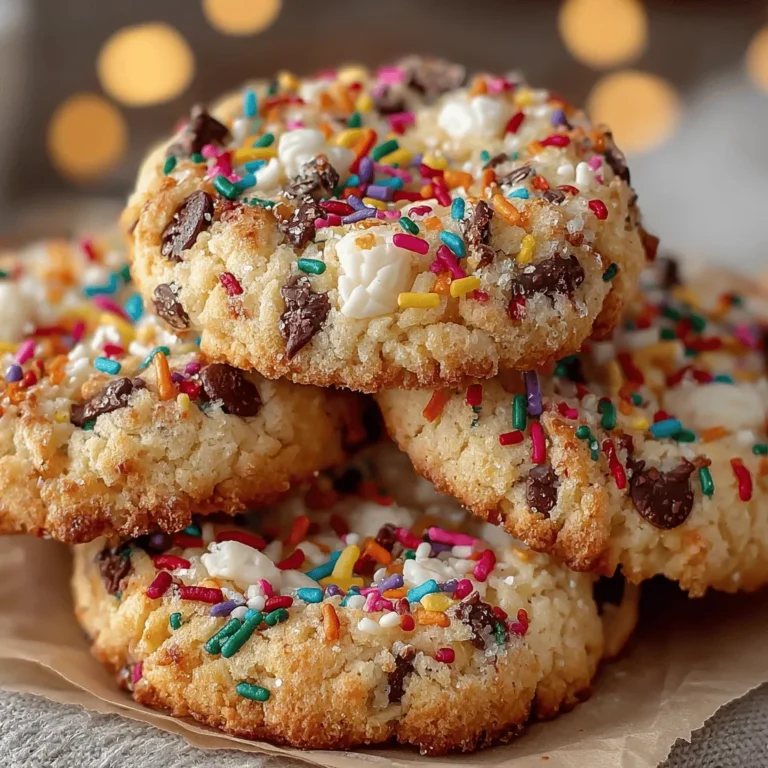
– Chocolate Chips and Sprinkles: These fun elements add color and excitement to the cookies, making them visually appealing. Chocolate chips provide delightful bursts of sweetness, while sprinkles bring a playful touch that kids will love.
– Oats and Cinnamon (optional): For those looking to add a bit of texture and warmth, oats can be included for a heartier bite, while cinnamon offers a comforting spice that enhances the cookies’ flavor.
Step-by-Step Guide to Making Mini Back to School Cookies
Now that we understand the key ingredients, let’s dive into the process of making these delightful cookies. Following this step-by-step guide will ensure that your baking experience is smooth and enjoyable.
Preheating the Oven
Before you begin mixing your ingredients, it’s essential to preheat your oven to the correct temperature—typically 350°F (175°C) for cookies. Preheating ensures that the cookies bake evenly and achieve the desired texture. A properly heated oven allows the fats to melt and the leavening agents to activate right away, resulting in perfectly baked treats.
Combining Dry Ingredients
The first step in the actual cookie-making process is to combine the dry ingredients. In a mixing bowl, whisk together the all-purpose flour, baking soda, and any other dry spices, like cinnamon if desired. This step is crucial as it ensures that the leavening agent is evenly distributed throughout the flour. Proper mixing prevents any clumps of baking soda, which could lead to uneven rising or odd flavors in the cookies.
Once the dry ingredients are well combined, set them aside and prepare for the next steps in this delicious baking adventure. By focusing on the details and enjoying the process, you and your child will be well on your way to creating a batch of Mini Back to School Cookies that will delight everyone.
Stay tuned for the next part of this article, where we will explore the remaining steps in the cookie-making process, including the exciting mixing of wet ingredients, shaping the cookies, and baking them to perfection.
{{image_2}}
Creaming the Butter and Sugars: Achieving the Perfect Texture
The foundation of any great cookie lies in the creaming of butter and sugars. Start by placing your softened unsalted butter in a large mixing bowl. Using a hand mixer or a stand mixer fitted with the paddle attachment, beat the butter on medium speed until it becomes light and fluffy—it should take about 2-3 minutes. Gradually add in both granulated sugar and brown sugar, continuing to mix until the mixture is well combined and airy.
This step is crucial, as the incorporation of air into the butter-sugar mixture helps to create a tender, chewy cookie texture. Be sure to scrape down the sides of the bowl periodically to ensure all ingredients are evenly mixed.
Incorporating Vanilla and Egg: Ensuring a Smooth Batter
Next, it’s time to add the vanilla extract and egg. Pour in one large egg and a teaspoon of pure vanilla extract into the creamed mixture. Beat on low speed until just combined. The egg adds moisture and binds the ingredients together, while the vanilla enhances the overall flavor of the cookies. It’s essential to not overmix at this stage; you want a smooth batter without any streaks of egg or vanilla lingering.
Combining Mixtures: Avoiding Overmixing for Tenderness
Now, you’ll want to combine your dry and wet ingredients. In a separate bowl, whisk together the all-purpose flour, baking soda, and salt. Gradually add this dry mixture to the wet ingredients, mixing on low speed until just combined. Overmixing can lead to tough cookies, so mix until you no longer see any flour. A few small lumps are perfectly fine, and your batter will still turn out wonderfully tender.
Folding in Extras: Techniques for Even Distribution
Once your dough is combined, it’s time to fold in your extras. This could include chocolate chips, mini marshmallows, or your choice of dried fruits or nuts. Use a spatula to gently fold these mix-ins into the dough, ensuring even distribution without overworking the batter. The trick here is to use a gentle hand and fold just until the extras are incorporated.
Scooping the Dough: Tips for Consistent Cookie Sizes
For consistent cookie sizes, use a cookie scoop or a tablespoon to portion out the dough. This not only ensures that your cookies bake evenly but also gives them a uniform appearance. Place the dough balls on a baking sheet lined with parchment paper, leaving enough space between each cookie to allow for spreading during baking. This step is essential for achieving that perfect bite-sized treat that kids will love.
Baking: Signs of Readiness to Avoid Overbaking
Preheat your oven to 350°F (175°C) while you prepare the cookie dough. When placing the cookie sheet in the oven, set a timer for 8-10 minutes. Keep a close eye on them, as baking times can vary based on your oven. The cookies are done when the edges are lightly golden, and the centers appear slightly soft. They will continue to cook on the baking sheet after being removed from the oven, so it’s better to err on the side of slightly underbaking than overbaking.
Cooling: Why It’s Crucial for Texture
After baking, allow the cookies to cool on the baking sheet for about 5 minutes before transferring them to a wire rack. This cooling period helps them set and develop that perfect chewy texture. Cooling is crucial, as it allows the cookies to firm up slightly while remaining soft in the center.
Serving and Presentation Ideas
To make these Mini Back to School Cookies even more appealing, consider how they are presented. Here are some creative serving suggestions:
– Colorful Lunch Box Arrangements: Pack the cookies in a vibrant lunch box alongside fresh fruits and a small note to brighten your child’s day. The colorful presentation will excite kids and make lunchtime something to look forward to.
– Creative Packaging for Gifts or Classroom Treats: For those looking to share, consider placing cookies in clear treat bags tied with colorful ribbons or in decorative boxes. This makes them perfect for back-to-school gifts, classroom treats, or even birthday parties.
– Serving Suggestions for Parties or Gatherings: Arrange the cookies on a platter with a variety of other snacks. You can even create a cookie bar at parties where guests can choose their favorite toppings or dips to accompany the cookies, adding an interactive element to the dessert table.
Nutritional Information
Understanding the nutritional aspects of your cookies is essential, especially when catering to children. Each mini cookie contains approximately 100 calories, with 4 grams of fat and 8 grams of sugar. While these cookies are a delicious treat, consider these potential modifications for a healthier option:
– Substituting Different Ingredients: You can use whole wheat flour instead of all-purpose flour to increase fiber content. Additionally, reducing sugar by about 25% can still yield a tasty cookie while cutting down on empty calories.
– Highlighting Balance: These cookies strike a balance between indulgence and nutrition. They can be enjoyed in moderation as part of a well-rounded diet, especially when paired with nutritious snacks like fruit or yogurt.
The Versatility of Mini Cookies
One of the best aspects of these Mini Back to School Cookies is their versatility. You can easily adapt the recipe for various occasions and preferences:
– Substituting Different Mix-Ins: Feel free to swap out chocolate chips for nuts, dried fruits, or even butterscotch chips to cater to different taste preferences. Each mix-in can create a unique flavor experience.
– Adjusting Flavors with Spices or Extracts: Experiment with spices like cinnamon or nutmeg, or add almond or peppermint extract for a seasonal twist. This allows for customization based on holidays or personal preference.
– Creating Themed Cookies for Holidays or Events: Shape the cookie dough into fun shapes or decorate with colored icing for holidays like Halloween or Christmas. The possibilities are endless, making these mini cookies suitable for celebrations year-round.
Conclusion
Making Mini Back to School Cookies is not just about baking; it’s about creating joyful experiences for both children and parents alike. The delightful combination of flavors and textures can bring a smile to any face and make the back-to-school routine a little sweeter.
Encouraging kids to help in the kitchen fosters valuable life skills and creates cherished memories. Enjoy the process of baking these easy, fun cookies together, and watch as they become a cherished part of your family’s routine. With simple steps and endless customization options, these cookies are sure to become a favorite treat that everyone will look forward to, whether it’s for school lunches, snacks, or a special occasion. So gather your ingredients, roll up your sleeves, and get ready to enjoy the sweet success of your Mini Back to School Cookies!
